


Here's the text.
Functions of My Library
Last Updated January 30, 2025
About My Library
In My Library, you can use various functions via the Internet. To use this service, you need your Yokohama City Library user number (library card number) and password.
Passwords must be 8 to 15 characters, and use at least one letter of English, numbers, and symbols. Capital and lowercase letters are also distinguished. (Spaces cannot be entered.)
- Authentication (Login)
- Confirmation of borrowed materials and extension of loan
- Materials that have been borrowed (loan history)
- Bookshelves
About the screen of My Library
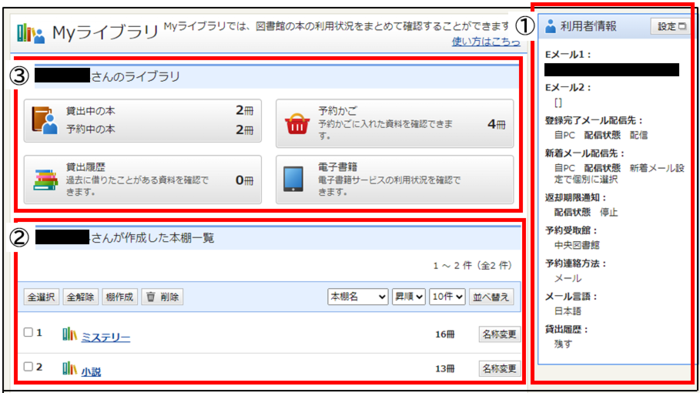
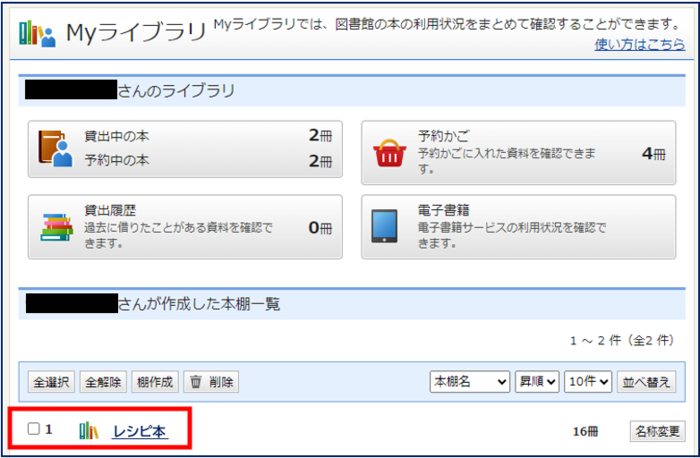
①"Library"
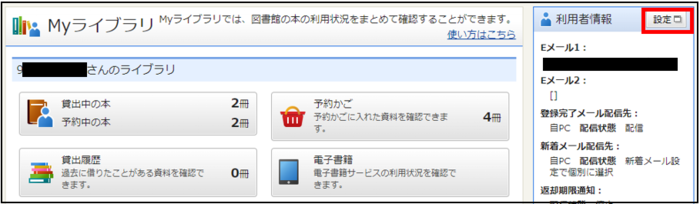
In addition to the status of books and magazines you are borrowing ("Books being borrowed") and reservation status ("Books being reserved"), you can register information on books and magazines you want to reserve in the future. You can check the usage status of "Kago", "Lending History" (only for applicants) that can record materials borrowed in the past, and "E-books".
②"List of Bookshelfs"
You can create a list of materials (bookshelf) yourself and register the materials you care about.
③"User Information"
In addition to registering and changing passwords and e-mail addresses, you can set e-mail delivery such as notification of the return deadline.
Authentication (Login)
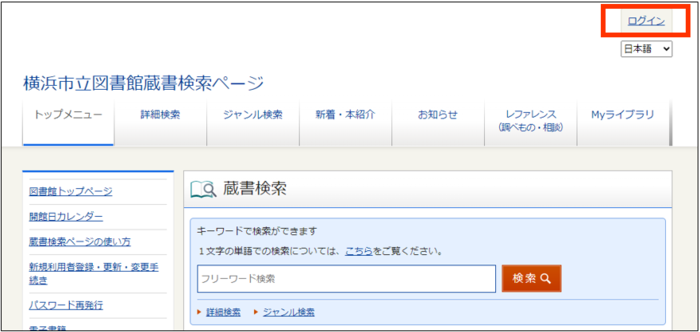
1.Press [Login] at the top right of the page of Yokohama City Library online catalog.
2.The "Authentication" screen is displayed. Enter the <user number (library card number)> (10-digit half-width number starting from 9) and <password> in the blank, and press [login].
※For the user number (library card number), enter only the number excluding the hyphen.
※The password is ●●●●● It is displayed and you can't see it.

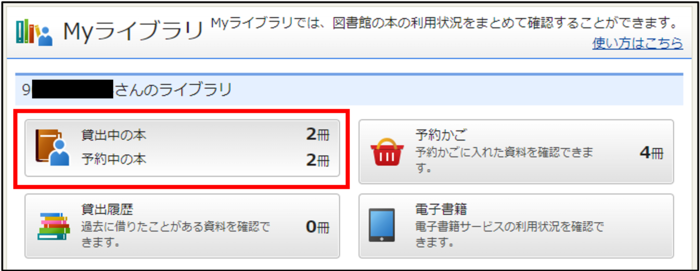
3.If the login is successful, the user number (library card number) of the person who logged in will be displayed at the top right of the screen.

If you are unable to log in
If you are logging in for the first time, please refer to the page "For those who log in to the online catalog page for the first time."
If you are unable to log in, a message will be displayed at the top left of the screen.
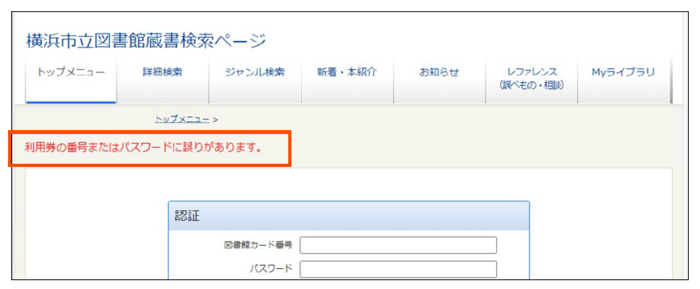
Please check the following points.
1.Are there any errors in the input contents?
If you have forgotten your password, please refer to "When you don't know the password on the online catalog page."
2.If you are unable to log in with a content other than the above
Please refer to "Frequently Asked Questions". For more information, please contact each library.
Confirmation of borrowed materials and extension of loan
You can check the number and title of the borrowed material and the return deadline. In addition, it is possible to extend the loan.
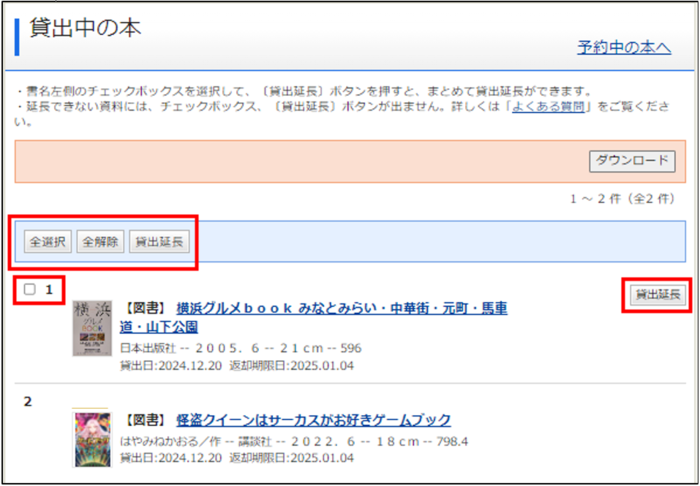
1.Press [Books being borrowed or bookings being reserved].
2.A list of books being borrowed will be displayed. You can check the materials you are borrowing, the date of lending, and the return deadline.
3.Materials with [Extension of loan] displayed on the right side of the title can extend the loan period. (This button will not be displayed on materials that cannot be extended.)
(1) Press [Extension of loan].
※If you want to extend more than one book at once, select the check box on the left side of the title and press [Extension of loan] at the top or bottom of the screen.
(2) The "Lending extension confirmation" screen will be displayed. If there is no mistake in the material to be extended, press [Extension of loan] at the bottom of the screen.
※The return deadline after extension will be displayed on the screen.
(3) If the "Lending extension application result" screen is displayed, the extension procedure is completed.
Materials that have been borrowed (loan history)

You can leave the history of the borrowed material. The storage period of the loan history is 5 years.
※The "Lending History" service is a function that can only be used by the user himself. The library cannot see past lending records.
How to set the loan history
1.Press [Settings] in the user information field on the right side of the top page of My Library.
2.The "Change usage information" screen is displayed. Check the <Leave> item in the lending history column at the bottom, and press [Update].
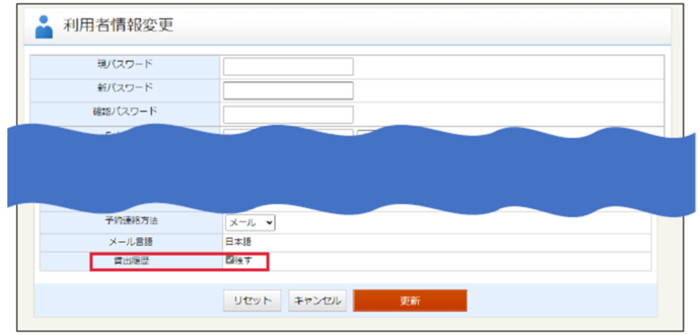
3.The "User Information Change Confirmation" screen is displayed. If there is no mistake in the changes, press [Update] at the bottom of the page.
4.When the "User Information Change Results" screen is displayed, the setting is completed.
※Those borrowed after checking by yourself are eligible. (It takes about 5 minutes for the change to be reflected.) The history can be viewed in the "Documents I have borrowed" the day after borrowing.
※You can stop saving your history at any time. If you want to cancel, uncheck [Leave] and be sure to press [Update].
※Books not held in City Library (such as books borrowed from libraries outside the city) do not remain in history.
How to check the loan history
1.Press [Lending History] in My Library.
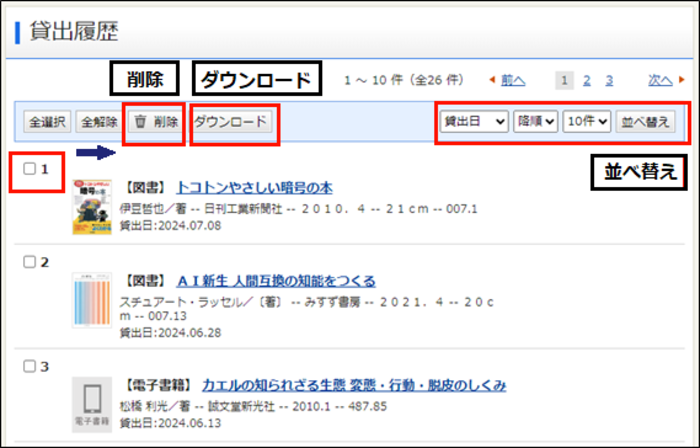
(1) Delete loan history
You can delete the history by selecting the checkbox on the left of the title of the document and pressing [Delete] at the top or bottom of the screen. (multiple selection is possible).
(2) Sorting of loan history
If you want to change the display order by lending date, title, author, etc., select the desired display order in the pull-down at the top or bottom of the screen and press [Sort].
(3) Download the loan history
You can download the history in text format (.txt) by selecting the checkbox on the left of the title of the document and pressing [Download] at the top or bottom of the screen. (multiple selection is possible).
Bookshelves
Bookshelf is your own book list function that allows you to register materials from the online catalog result screen. You can create bookshelves with your favorite theme and register library materials.
Up to 10 bookshelves can be created, and up to 1,000 books can be registered each.
- Create a bookcase
- Change the name of the bookshelf
- Add materials to the bookshelf
- How to view bookshelf materials list screen
Create a bookcase
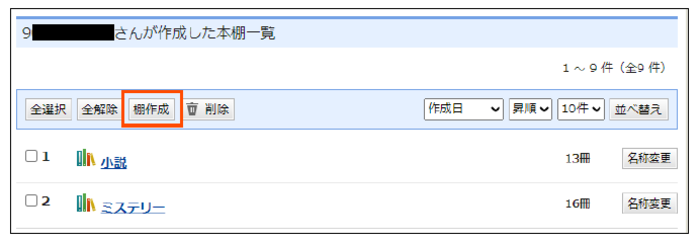
1.Press [Create Shelf] in the list of bookshelfs on the top page of My Library.
2.The "Create Bookshelf" screen will be displayed. Enter the name of the bookshelf and press [Register].

3.The "Bookshelf Creation Confirmation" screen will be displayed. Confirm the name of the bookshelf and press [Register].

4.The bookshelf created in the list of bookshelfs on the top screen of My Library will be added.
Change the name of the bookshelf
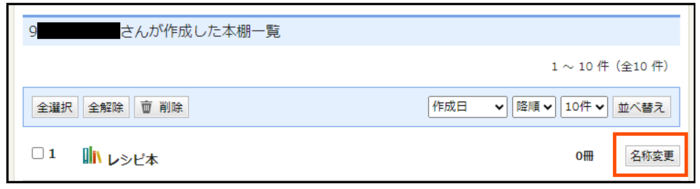
1.Press the [Change name] button on the right side of the bookcase name.
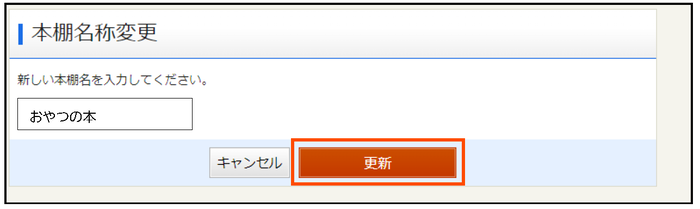
2.The "Change Bookshelf Name" screen will be displayed. Enter a new bookcase name and press Update.
3.The "Change of Bookshelf Name" screen will be displayed. Confirm the name of the bookshelf you want to change and press [Update].
4.The name of the bookshelf changed to "List of Bookshelfs" on the top page screen of My Library will be reflected.
Add materials to the bookshelf
You can add the search material to the "Bookshelf".
1.Search for materials from "online catalog" and "advanced search" on the top page of Yokohama City Library online catalog page.
2.Check the materials you want to add to the bookshelf on the "Search Result List" screen (multiple selections are possible), or press the title to open the "Materials Details" screen and press [Go to Bookshelf].
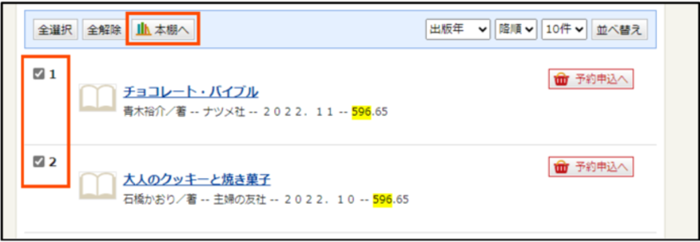
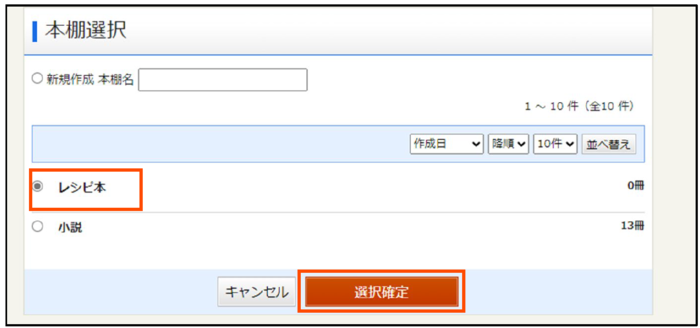
3.The "Select Bookshelf" screen will be displayed.
Select the bookshelf you want to add the material and press [Select Confirm]. If you want to add a new bookcase, select a new one, enter the name of the bookcase, and press [Select Confirm].
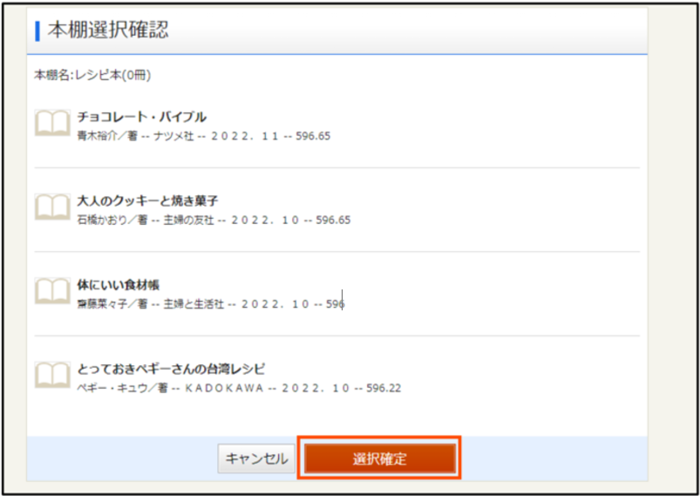
4.The "Bookshelf Selection Confirmation" screen will be displayed.
Check the name of the bookshelf and materials to be added, and press [Select Confirm].
5.When the "Bookshelf Registration Result" screen is displayed, it is completed.
How to view bookshelf materials list screen
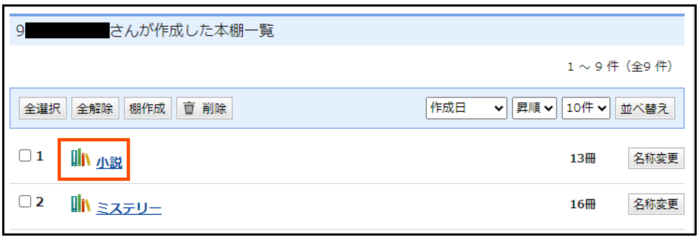
1.When you press the name of the bookshelf displayed in My Library, the "List of Bookshelf Materials" screen is displayed.
2.On the "Bookshelf Material List" screen, you can delete, copy, move, and change the display order of registered materials.
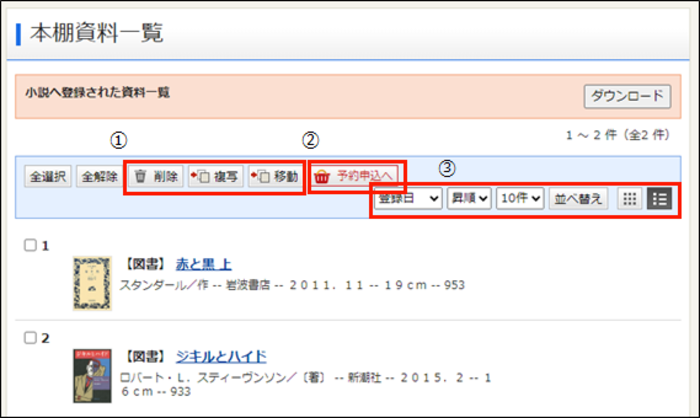
①Delete, copy, and move materials
Select the checkbox on the left side of the document name (multiple selections are possible), and select the content you want to change from each item at the top or bottom of the screen.
- Deleted: Remove the materials from the bookshelf.
- Copy: Register the same materials on other bookshelfs. (The materials will remain on the bookshelf currently displayed.)
- Move: Move the materials to other bookshelfs. (The materials are not left on the bookshelf currently displayed.)
②Reservation application
To the reservation application: Put the materials in the reservation basket and proceed to the reservation application. (The materials will remain on the bookshelf currently displayed.)
③Change in display order
If you want to change the display order by the registration date, title, author, etc., select the desired display order in the pull-down at the top or bottom of the screen and press [Sort].
Inquiries to this page
Board of Education Secretariat Chuo-toshokan Planning and Management Division
Telephone: 045-262-7334
Telephone: 045-262-7334
Fax: 045-262-0052
Email address: ky-libkocho-k@city.yokohama.lg.jp
Page ID: 999-332-837


